Multimonitor
NComputing NoTouch Desktop supports multimonitor (dual display) operation. In fact, the dual-screen operation has become very common in today's offices and so is it a commonly used feature on machines run by NoTouch.
Contents
- 1 Background
- 2 NComputing Pi Zero SDA Connection for RX-HDX thin client
- 3 Dual Display Prerequisites for RX-HDX thin client
- 3.1 Prerequisite #1: Enable cloned multi-screen in Multimonitor mode (default setting)
- 3.2 Prerequisite #2: Both devices, the RX-HDX thin client and the NComputing Pi Zero SDA must use the same display resolution
- 3.3 Prerequisite #3: The H.264 support must be enabled for the Citrix connection where the NComputing Pi Zero SDA will be used
- 3.4 Troubleshooting - In case you could not get NComputing SDA to work properly, please review the following checklist:
- 4 Multimonitor parameters
- 5 FAQs
Background
RX420 (HDX) and EX400 thin clients
The RX420 (HDX) thin client and EX400 thin client come with a native dual display with resolutions up to 4K Ultra HD. By default, the system will output the same image on both screens ("cloned" mode in our terminology) which is usually a safe bet and also works if there is only one monitor connected. In an office scenario where you have two monitors next to each other, you most probably want to have both monitors being part of a large logical desktop, this is called "merged" mode.
In "merged" mode, when operating remote desktops such as via Citrix, VMware or RDP, the server-side Windows desktop may or may not know about the actual screen geometry. In the simplest case, server-side Windows may believe that there is a single screen that is 3840 pixels wide, for instance, when the client has two monitors connected with 1920 pixels horizontally each. Now if you maximize a program window, it would be maximized over both screens - and most people feel uncomfortable with that. That means it is important that the server-side Windows instance gets to know about the actual screen geometry on the client-side - and fortunately, this is done automatically the way NoTouch is configured by default. Not all protocols support this, but the Citrix Receiver, VMware Horizon View client, and FreeRDP do and you can tune the settings.
RX-HDX thin client
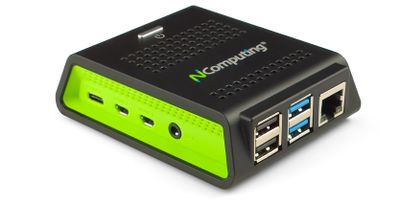
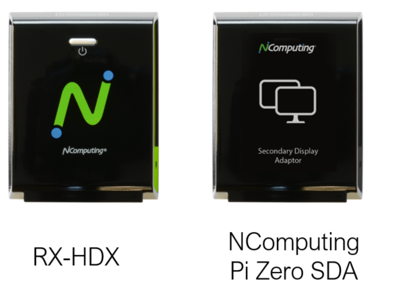
In partnership with Citrix, NComputing Pi Zero HDMI Secondary Display Adapter (SDA) expands the functionality of the RX-HDX thin client to deliver high performance and responsive HD content across two monitors.
NComputing Pi Zero SDA Connection for RX-HDX thin client
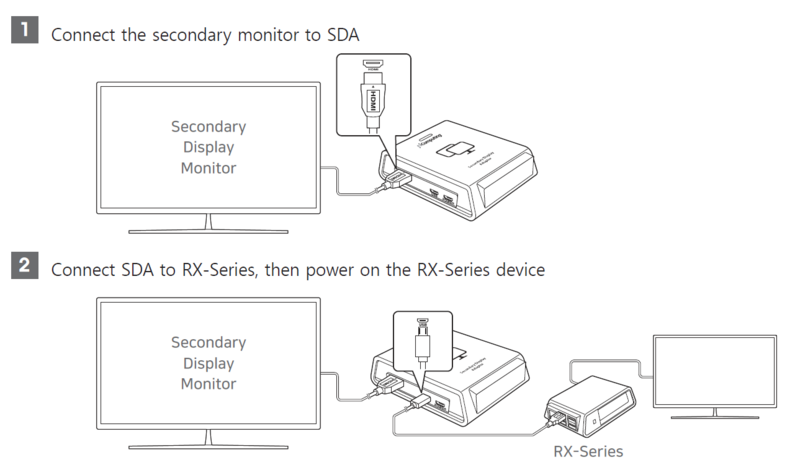
First connect the secondary monitor to the NComputing Pi Zero SDA, then connect the SDA (from the micro-USB port) to the RX-HDX thin client which is connected to the primary display monitor. Then power on the RX-HDX thin client.
Dual Display Prerequisites for RX-HDX thin client
There are a few important prerequisites which must be properly configured to extend the RX-HDX thin client to dual display (one logical desktop displayed across two monitors).
Prerequisite #1: Enable cloned multi-screen in Multimonitor mode (default setting)
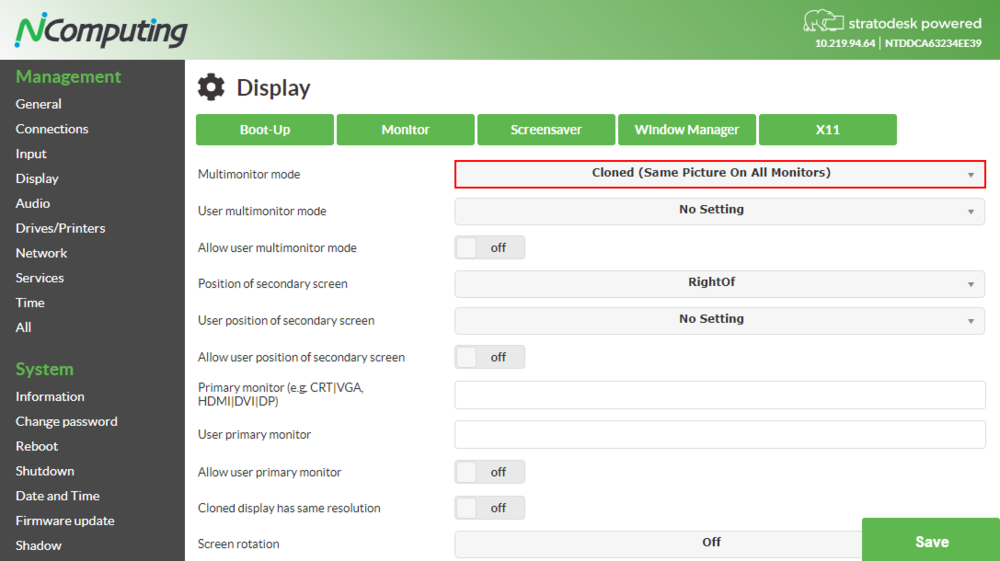
The default setting for “Multimonitor mode” is “Cloned”. This option is also required for the RX-HDX thin client to properly extend the desktop into dual display, with the connected NComputing Pi Zero SDA.
You may need to change the “Multimonitor mode” value back to “cloned” if the default value has been changed.
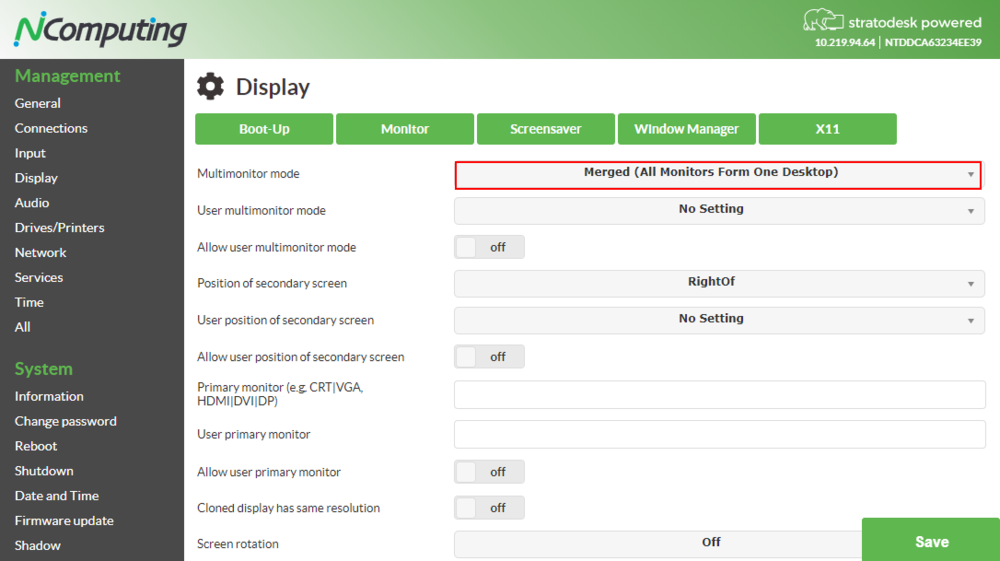
To enable cloned multi-screen, set the parameter "Multimonitor mode" in the "Display" options to "cloned" (see screenshot below). If you use NoTouch Center, it is part of the "Group Settings" / "Desktop" options. Make sure the change is saved and then reboot the device for the changes to take effect.
Prerequisite #2: Both devices, the RX-HDX thin client and the NComputing Pi Zero SDA must use the same display resolution
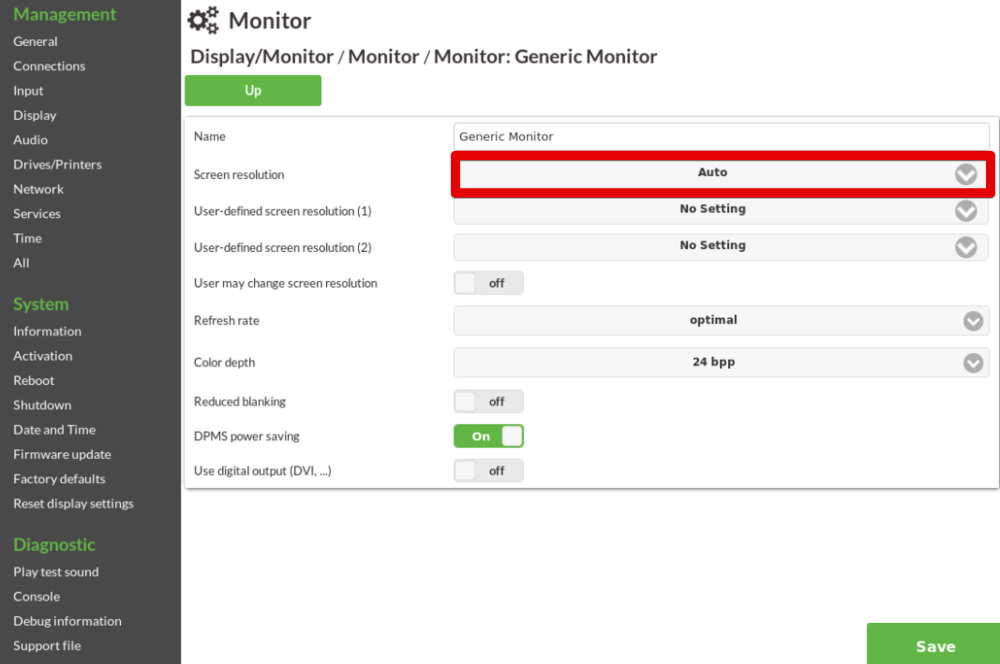
If the primary monitor and secondary monitor have the same default display resolution, then simply set the resolution of the RX-HDX thin client’s primary display to ‘auto’ (see screenshot below). This will ensure the primary display monitor will have the same display resolution as the secondary display monitor (resolution auto detected and set by the connected NComputing Pi Zero SDA).
If the primary monitor and secondary monitor have different resolutions (e.g., different monitor types), then select a display resolution from the primary display monitor (connected to the RX-HDX thin client) that matches with the auto-detected secondary display monitor (connected to NComputing Pi Zero SDA). This will ensure both display monitors have the same display resolution.
Prerequisite #3: The H.264 support must be enabled for the Citrix connection where the NComputing Pi Zero SDA will be used
There are two parts to this.
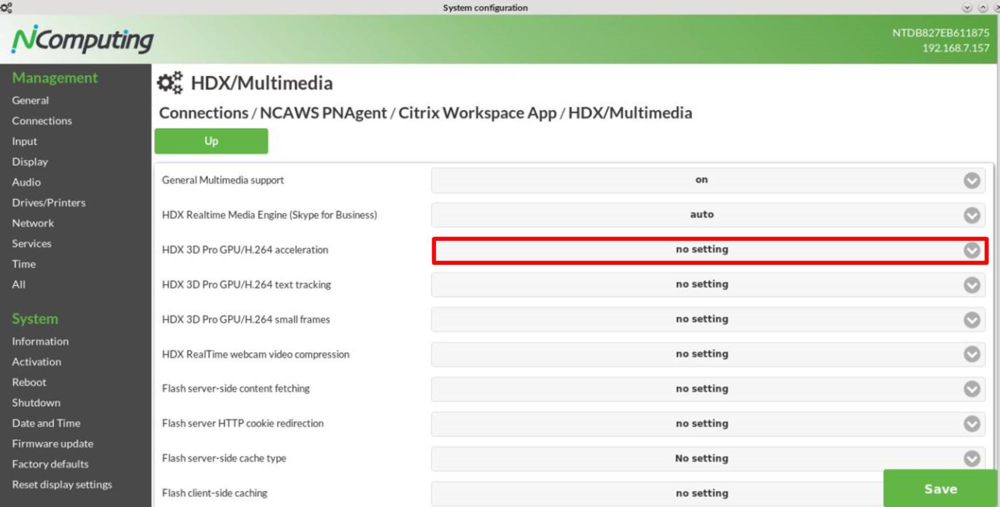
First, from the RX-HDX thin client, keep the default ‘no setting’ option for “HDX 3D Pro GPU/H.264 acceleration” (see screenshot below). The Citrix receiver in this case will simply use the preference from the Citrix server.
Second, the Citrix server (the VDA machine) must set H.264 encoder for the entire session screen. In XenApp/XenDesktop 7.6 (which is the minimum support version for RX-HDX dual display mode), the H.264 (aka deep compression) is the default display mode. From version XenApp/XenDesktop 7.6 FP3 the display mode is configured through Citrix Policy and should be set “For the entire screen” to be used in “Use video code for compression” (See screenshot below).
Note: Only full-screen published desktop sessions can be extended to NComputing Pi Zero SDA. Published applications can only be displayed on the primary screen.
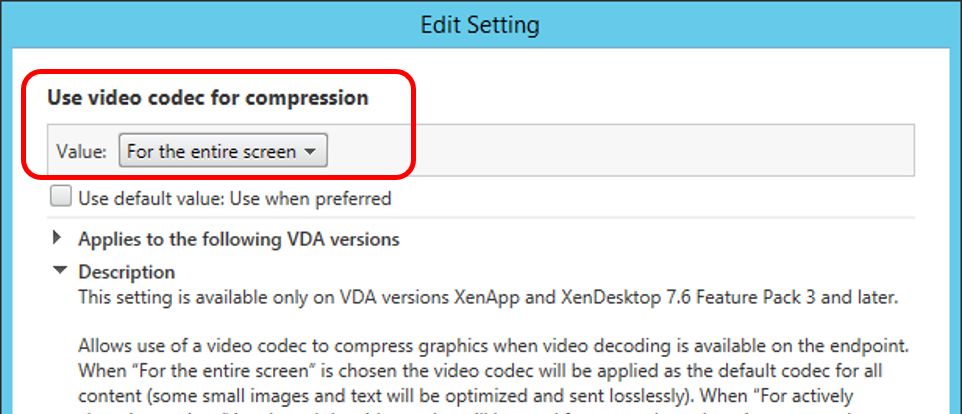
With the above prerequisites the Receiver should extend the session to the NComputing Pi Zero SDA once the user logs on.
Troubleshooting - In case you could not get NComputing SDA to work properly, please review the following checklist:
(1) The NComputing SDA must be connected to the RX-HDX thin client with the provided USB cable. There are 2 USB micro-ports on the SDA, one labeled "USB" and the other one labeled "Power". Be sure to connect the USB cable to the SDA's micro-port that is labeled "USB".
(2) Keep the 'Multimonitor mode' parameter set to the default "cloned (same picture on all monitors)" value. You can find this parameter by going to RX-HDX Settings -> Display -> Multimonitor mode. Please refer to Prerequisite #1 above for more details.
(3) Both RX-HDX thin client and the NComputing SDA monitors must use the same display resolution and orientation. In case both monitors have different resolution, please refer Prerequisite #2 above to customize the setting.
(4) H.264 support must be enabled for the Citrix connection where the NComputing SDA will be used. Please refer to Prerequisite #3 above for more details.
(5) HDX Media Streaming Flash Redirection should be disabled. You can find this parameter by going to RX-HDX Settings -> Connection -> Citrix Receiver -> HDX/Multimedia.
(6) Make sure your NComputing SDA image is up-to-date. From RX-HDX firmware (version 2.40.3138 or higher), check RX-HDX settings -> Diagnostic -> Debug information -> Citrix SDA. This page will inform you whether the NComputing SDA image is up-to-date. If it is not up-to-date, reboot your RX-HDX device and the RX-HDX device will automatically attempt to update the NComputing SDA image right after reboot.
(7) Require minimum Citrix VDA version 7.6 or above (at the moment of writing this page, the latest VDA LTS is version 7.15) to support dual display (with NComputing SDA). Please refer to Prerequisite #3 above for more details.
(8) Check the Citrix policy setting to ensure that the video codec (aka H.264 or deep compression) is used for the entire screen. Please refer to Prerequisite #3 above for more details.
(9) If you have non-HDMI monitors, we recommend to use active media adapter to convert HDMI signal into other signal for best compatibility.
Multimonitor parameters
- Multimonitor mode. Multimonitor operation master switch:
- off. Do not consider any second monitor at all.
- cloned (same picture on all monitors). This is the default setting and should be used if the user wants to use NComputing Pi Zero SDA to extend the desktop to dual display.
- merged (all monitors form one desktop). This option should only be used if the user decides to use a non-NComputing Pi Zero SDA.
- Matrox G4xx/G5xx (deprecated). This was a special mode for the now EOL-ed Matrox G4xx/G5xx graphics cards. Do not set it on other machines.
- Position of secondary screen. Defines the position of the second screen, either right or left of the primary monitor.
- Primary monitor. This defines which monitor should be considered the "primary". This parameter makes only sense on systems where there are both an analog (VGA) and digital output (DVI) so that one can distinguish between them. Values can be logically or-ed by the pipe symbol, thus HDMI|DVI means HDMI or DVI. Acceptable values are: CRT, VGA, HDMI, DVI, DP
- Cloned display has same resolution. If you clone the screen, e.g. to a secondary display or a projector, should the second display forced to the resolution of the primary monitor, yes or no.
FAQs
The resolution is not set correctly
Some devices, especially TV sets or projectors, may fail to provide correct EDID/DDC data. This is their fault, actually, but nevertheless you have to cope with it: Please set the desired resolution manually.
Furthermore KVM switches usually cripple EDID/DDC traffic. If you don't plan on using the KVM switch productively (which is highly unlikely), don't use one for testing/evaluating.
There is no output display when I connect RX-HDX or RX420 (HDX) to my VGA monitor (via HDMI-VGA adapter)
There is no picture on the monitor as the HDMI-VGA adapters usually do not pass the EDID data and Raspberry Pi is unable to automatically configure display resolution. You need to force the video output to run with the desired (monitor’s native) resolution. Please do the following:
- Under ‘Display/Monitor’ settings select the desired screen resolution instead of ‘Auto’.
- Select the 60Hz refresh rate (instead of ‘Optimal’).
- Under ‘Services/Raspberry Pi/config.txt/config.txt’ add an entry and set it to ‘hdmi_force_hotplug=1’. With it, the RX-HDX device will always behave as if a monitor would be detected (even when obtaining the EDID data through DDC failed).
- Reboot the device. It should work with the configured resolution through the HDM-VGA adapter.
