NComputing Knowledge Base
- Mobile
- Desktop
File exchange
This article explains how to use various tools to exchange files with systems in the NoTouch ecosystem.
The NComputing Virtual Appliance runs several services that allow file exchange:
- Secure Shell (SSH).
- Windows file sharing server.
- WebDAV-capable server.
NoTouch endpoints have an SSH server that allows file exchange as well - thus the procedures described herein regarding "SecureShell/SSH" work for both NComputing Virtual Appliance and NoTouch endpoints (Endpoints only can do SCP, whereas the Virtual Appliance can do both SFTP and SCP. If in doubt, use SCP).
Why would you need all this? There are several reasons: For instance, the appliance can host files that are distributed to clients, such as certificates or desktop wallpapers. Also you might deploy a report template or a script that you have created - or simple updating of compontes using deb files.
Note: Some target folders can be only be written to by the root user. That means you first have to copy a file into the notouchadm home directory, and then log in via SSH, become root, and copy the file. If are not familiar enough with Linux to do this, don't - there is always another method. NoTouch never requires shell/SCP access, you can do everything you want with normal configuration parameters.
Contents
Secure Shell/SSH protocol
WinSCP
WinSCP is a free, graphical and intuitive tool to exchange files over the Secure Shell (SSH) protocol.
Setup WinSCP
- Download WinSCP from http://winscp.net/eng/index.php
- Install WinSCP
- When asked which "view" you want, we suggest "Explorer" view unless you know and like "Norton Commander"
Use WinSCP
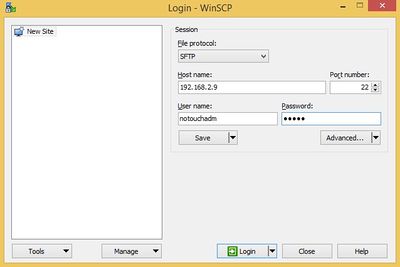
When opening WinSCP first time, it will ask you for connection information:
- Enter the host name or IP address of your target system (i.e. the NComputing Virtual Appliance)
- Enter username of notouchadm
- Enter your password (the one that you set when deploying the VA).
Please keep in mind Notouch OS does not support SFTP, only SCP. The Virtual Appliance however can do both protocols.
We recommend to click on the "Save" button to save this connection information for later use.
Next, click the "Login" button. When connecting first time, WinSCP will ask you to accept the host's keys. Most likely you will say "Yes" here.
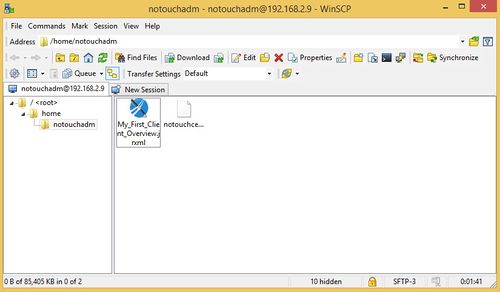
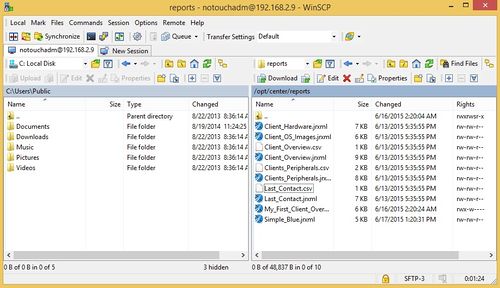
Finally you will be presented the NComputing banner saying "This is a private system..." and then you will get the real WinSCP user interface. Depending on whether you have selected Explorer or Commander View, it will look like the first or the second following screenshot - first is "Explorer view".
In this view you can navigate directories on the left, and browse files on the right. Drag and Drop to other Explorer windows is fully supported.
On the other hand, this is Commander View:
Here you see two directories, one left, one right, and you can navigate each of them separately. If you have worked with Norton Commander (... these good ol' days...) you will love this.
PuTTY/PSCP
PuTTY is not only a tool for interactive login - it includes pscp.exe, a command-line tool for file copying.
Setting up PSCP
- Download the PuTTY installer from http://www.chiark.greenend.org.uk/~sgtatham/putty/
- We suggest to get the whole installer package, not just individual .exe files. Well, it is up to you...
- Install the files
- Add the PuTTY path to your PATH - after all you want to call pscp.exe from any location and not always include the full path name (... ah, Windows ...)
- Go to Control Panel > System and Security > System > Advanced system
settings > Environment Variables
- Add C:\Program Files (x86)\PuTTY\ to the PATH environment variable
Using PSCP
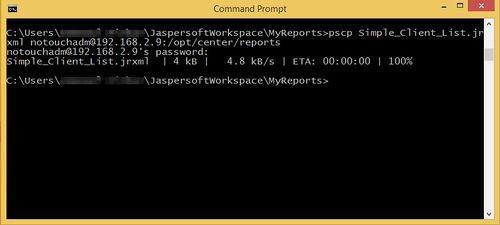
pscp.exe is a command line program. For instance you can call it from CMD.EXE. The general syntax is:
pscp FILENAME username@host:targetpath
thus this would be a valid command to copy the MyReport.jrxml file to the other machine into the specified directory:
pscp MyReport.jrxml notouchadm@192.168.2.9:/opt/center/reports
Similar to what WinSCP does, PSCP will ask you to accept a host key on first launch. Simply answer with a "y" for yes. This question comes up one time only.
Of course, you can reverse the syntax and copy things from another host as well:
pscp notouchadm@192.168.2.9:/opt/center/reports/*.csv .
The command above would copy all csv files from the /opt/center/reports directory on the other machine to the current directory on the local machine.
Windows File Sharing
The NComputing Virtual Appliance includes Samba, a Linux-based server for the Windows File Sharing mechanism. It only allows access to certain predefined folders.
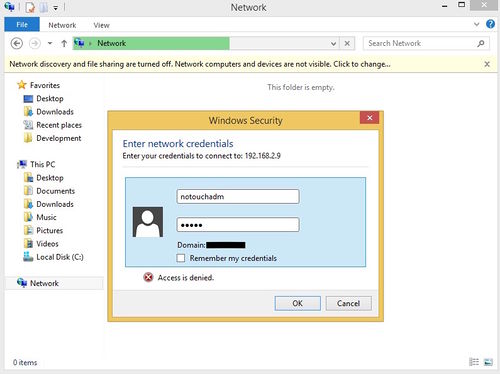
- You can easily browse to the Virtual Appliance by entering \\HOSTNAME into any Explorer windows (of course, use the real host name of your NComputing Virtual Appliance).
- To log in, use
- the username
notouchadm - the VA password - the one you have assigned when deploying the VA in the hypervisor console
- the username
Note: The password is not the same as the client admin password that the the NoTouch endpoints use. Also, it might not be the same that you use for NoTouch Center login.
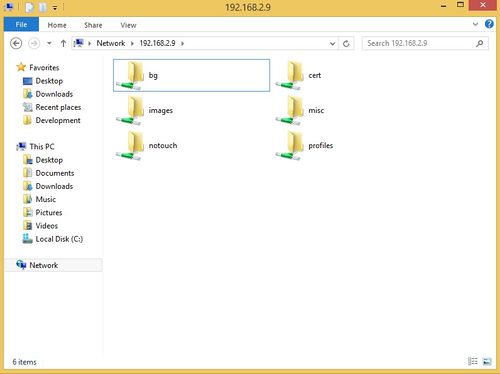
Windows will then show a list of shares:
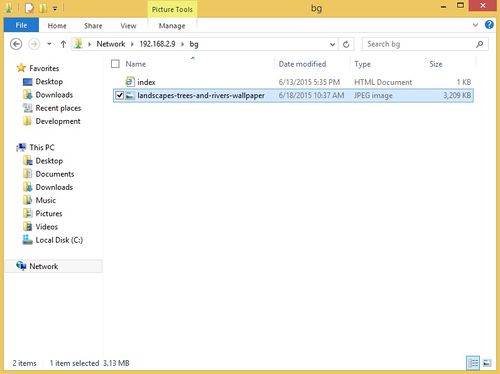
We can connect to each individual share by just clicking on one, or could have also asked Explorer to jump to \\HOSTNAME\\bg for instance. In the following example we are connected to the bg folder and have already copied a file there using regular drag and drop:
WebDAV
NComputing Virtual Appliance also has a WebDAV-capable web server that allows access to the same directories that you can connect via Windows File Sharing.
To access via WebDAV:
- Get a working WebDAV client (Windows Explorer claims to be compliant, but it is buggy. It won't work with Windows explorer).
- Enter the VA administration console and go to "Management" / "File store"
- Copy/paste the desired link you want to access into your WebDAV client.
